Woodshop Musings
10 Steps for Bending Solid Wood
To be thorough, I looked into various options for bending wood. There are multiple ways to go about this:
- Bendable Plywood
- Kerf-Cut Bending
- Steam Bending
Bendable Plywood
Bendable plywood is designed for making curved parts. This method seems to be easier compared to other methods, but requires veneer to be added to each surface, and plywood/veneer are expensive. Using plywood/veneer does not bode well for a high-quality end product that should last generations. It might be an easier method, but not the right solution.
Kerf-Cut Bending
This method involves cutting numerous slots in the wood to make it bendable. The slots can't be cut too deep or too shallow. Too shallow and the board won't bend; too deep and the wood will just break. This method weakens the board and requires veneer to hide the slots. This process can be done on solid wood, but reduces the longevity of the piece.
Steam Bending
This method involves placing wood in a steam chamber to loosen the fibers to make it easier to bend. It's recommended to use air-dried hardwoods that have straight grain running parallel to the edges. I decided I would move forward with this method, because I didn't have to use plywood, veneer or weaken the structural integrity of the piece.
How I Bent Solid Oak
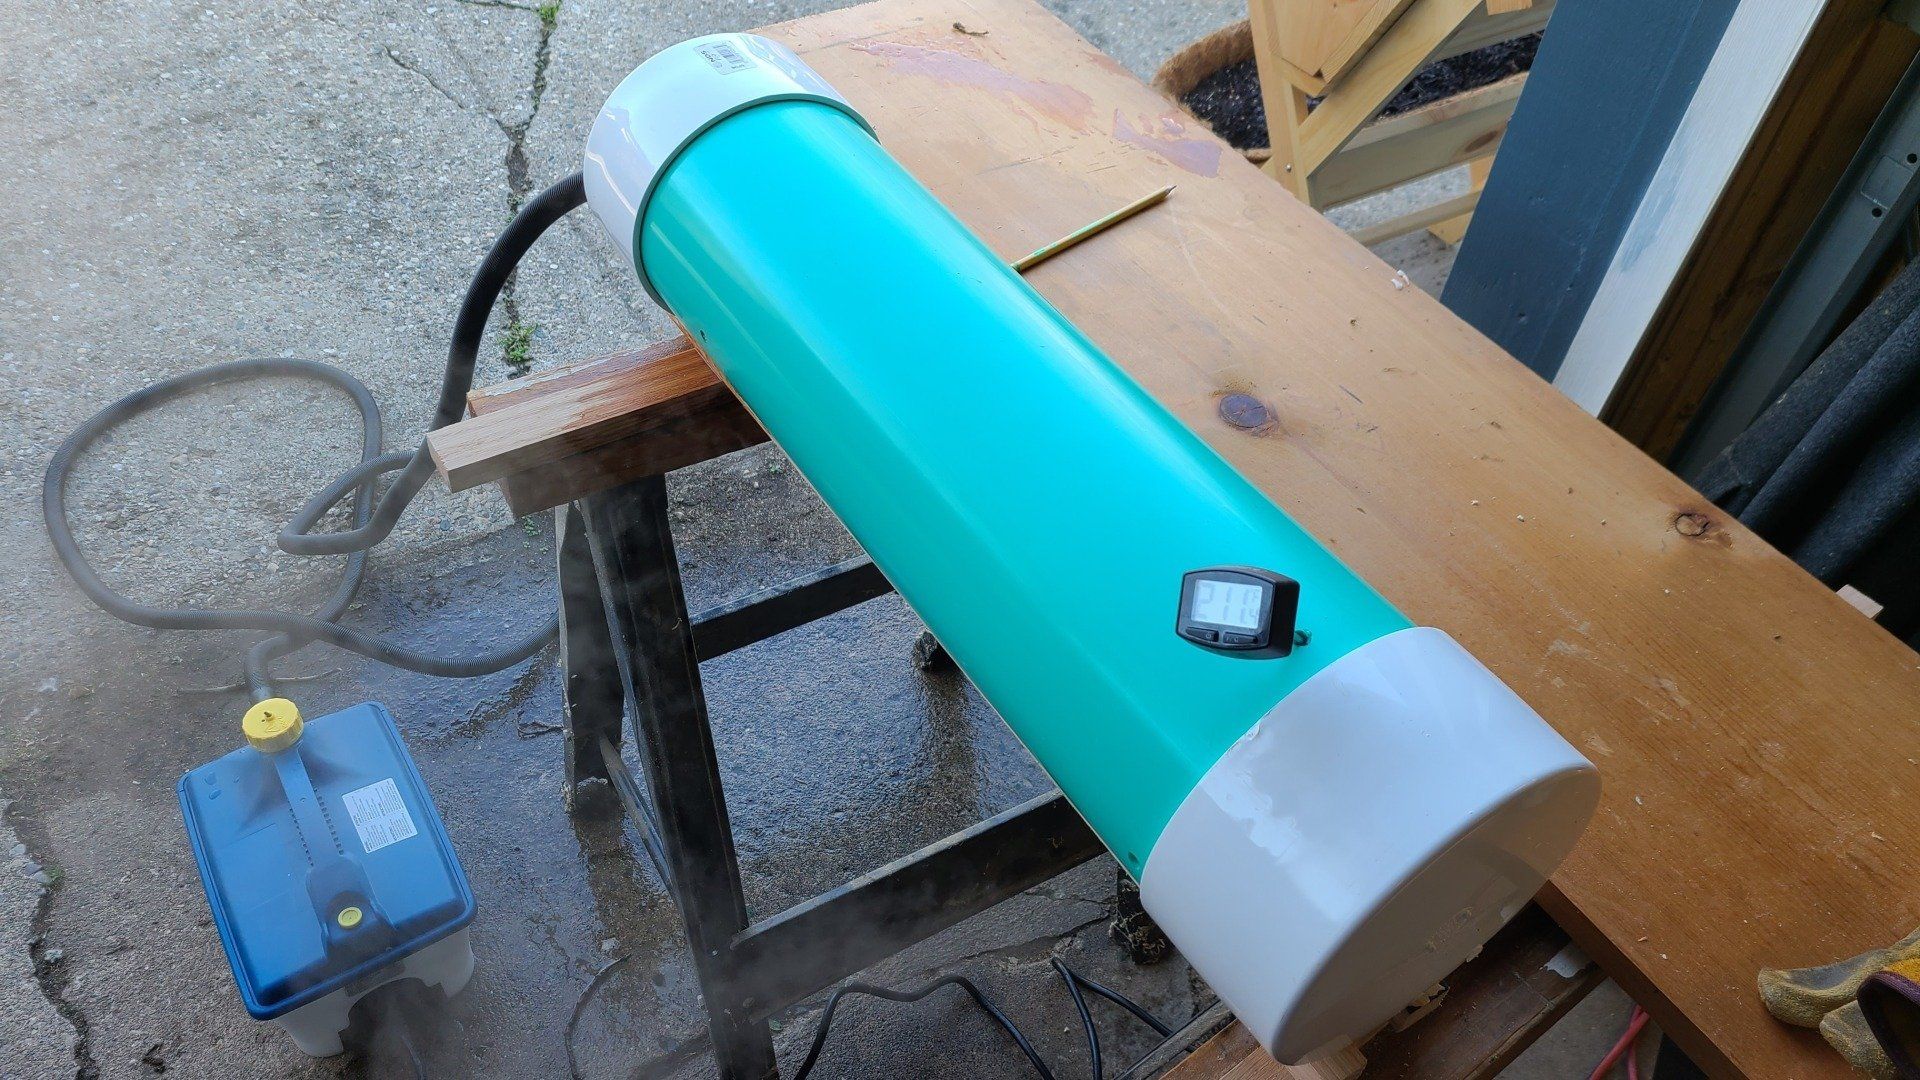
I made a steam chamber out of a 6" PVC pipe with caps on the ends and drilled holes to allow the vapor and condensed vapor to escape. Not having proper venting will just create a steam powered bomb! I purchased a
steamer from Rockler and attached it to the chamber.
I don't have easy access to air-dried oak, so I moved forward with kiln-dried oak. When wood is kiln-dried, the lignin in the wood dries out and hardens making it even harder to bend. To account for this, I submerged the boards in water for at least 24 hours prior to steam bending.
When wood bends, the inner surface compresses and the outer surface wants to stretch. This fact was visible during my initial tests. In one instance I saw the inner surface actually wrinkle up, like a rug when you trip on it. In another instance, I saw the outer surface stretching, which shows up as long splinters shooting off, tangent to the curved surface. The solution to this is quite simple - a compression strap.
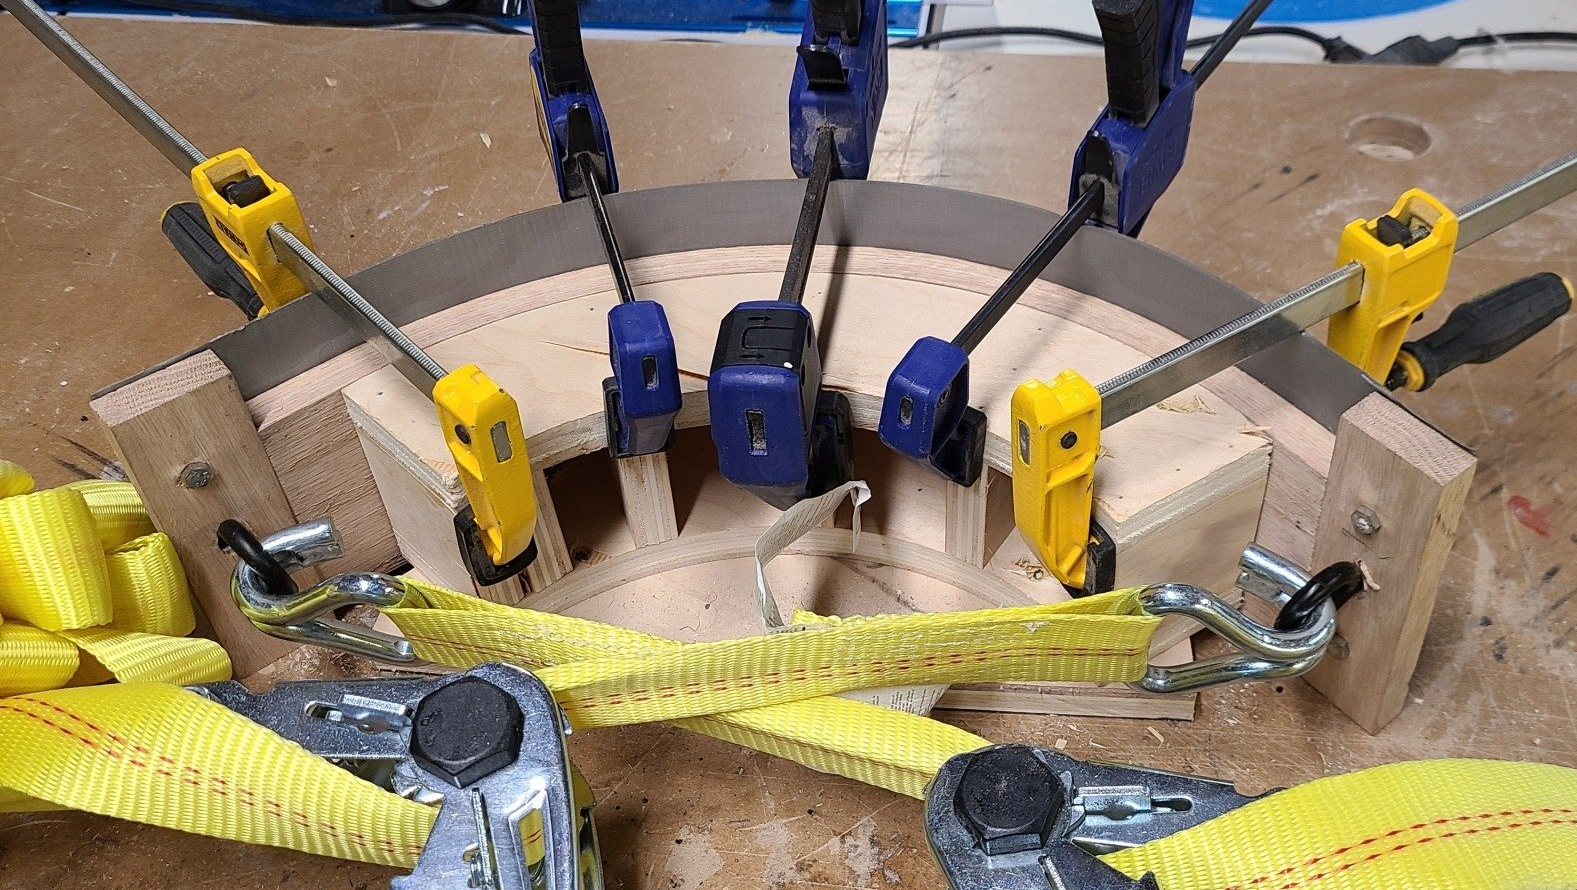
The objective of a compression strap is to force the outside surface to be under compression instead of wanting to stretch. I made the compression strap out of a metal sheet with wood stoppers on either end. The wood is placed between the stoppers, which doesn't allow the board to stretch. I installed eye bolts on the compression strap stoppers as a place to attach ratchet straps to aid in bending.
Because I was using kiln-dried oak, I decided to steam it longer than recommended. It's recommended to steam for 1 hour for every 1" of thickness. I was using ¾" thick oak, so technically I only needed to steam for 45 minutes, but I decided to steam for 1 hour. After the wood is done steaming, the wood needs to be removed from the chamber, added to the bending form with the compression strap and bent to shape in just a minute or two. Not moving fast enough will allow the wood to stiffen causing stress fractures during the bending process.
After leaving the board in the bending form to cool, I carefully transferred it to a holding form. I tried to minimize and mitigate the spring-back that occurs once the board is removed from the forms. I did this in two ways: (1) made the board longer than I needed so I could remove the portions of the curve that would spring-back, and (2) kept each board in a holding form for at least a few days.
After a few practice runs, I was able to successfully bend solid oak with the correct curvature my design called for.
Steps I Used for ¾" Kiln-dried Oak:
- Assemble the steam chamber.
- Submerge the boards in water for at least 24 hours.
- Start the steam chamber and wait until the steam reaches 212 degrees Fahrenheit.
- Place the board in the steam chamber for 1 hour.
- Get the bending form area setup with the bending form, compression strap, ratchet straps and clamps.
- Remove the board from the steam chamber and quickly place it in the bending form.
- Using the ratchet straps, bend the board around the form, clamping to help hold it in place.
- Wait until the board cools, then carefully transfer to a holding form.
- Remove the board from the holding form after a few days.
- Any small splintering that might appear as the wood cools can easily be sanded out.
Bending solid kiln-dried oak can be done with patience, persistence and the right equipment. I look forward to using this new skill in future projects!

